
I have several of the plastic-covered portable greenhouses which have been very reliable for 5 years. They are small and easy to heat with a small electric heater. They are vented so I can open up the sides and gables to allow air flow and cooling. However, the plastic begins to deteriorate in 5 years and must be replaced. My biggest complaint is the both the heating and venting was MANUAL, which meant I had to open and close them twice a day everyday during use...no days off or vacations! They are also not very attractive...not something I would want to look at through my kitchen window every morning.
So, my initial experiences dictated my requirements for my new hobby greenhouse:
- Attractive
- Automatic heating and ventilation
- Made from materials that will withstand our sun (UV) and weather (hail, wind).
- Long lasting materials with decades of use
- Last but not least, affordable
The selection process was trickier than I thought. There are many greenhouse companies out there that provide good kits that include greenhouse and heating/ventilation in a range of materials, sizes, and prices. The problem I found was that the cheaper versions would not hold up to Texas weather and were unattractive - basically plastic sheeting on PVC or lightweight galvanized material. The more expensive models were attractive and made of nice material but cost too much - 5 to $10,000.
A Google ad (which I generally abhor) popped up on some screen for a Mueller's greenhouse. I know Mueller's as they build quality metal buildings all over Texas. There are two things obvious at first glance at the Mueller's greenhouse: First, it is the most solidly built greenhouse I have ever seen; built with heavy C-perling, plastic sheets guaranteed to last and not yellow under the sun, with pretty green molding on all the corners. The second thing that was obvious is that Mueller's had never built a greenhouse before and had no idea how to seal, ventilate and heat it. In spite of that, I decided to go for the quality and correct any greenhouse-specific problems along the way.
It took some extra work and cost but I'm very happy with my new greenhouse. It has been in operation for a couple of months with several nights in the 20s and many days in the 80s. In the next blog, I'll cover the customizations I made to the structure to make it "greenhouse capable".

Mueller's greenhouses come in several sizes. I chose the 9x12 ft. model because 100 sq. ft. is about the maximum that you can heat with an electric heater. This model retails for $2095 and comes delivered (and taxed) at around $2400. I added automatic ventilation, heater and thermostat, custom shelving, plus extra materials for running electric and water lines, caulk and other sealing materials, 4x4 treated lumber for the foundation, and concrete for the anchors for a total of $3400.
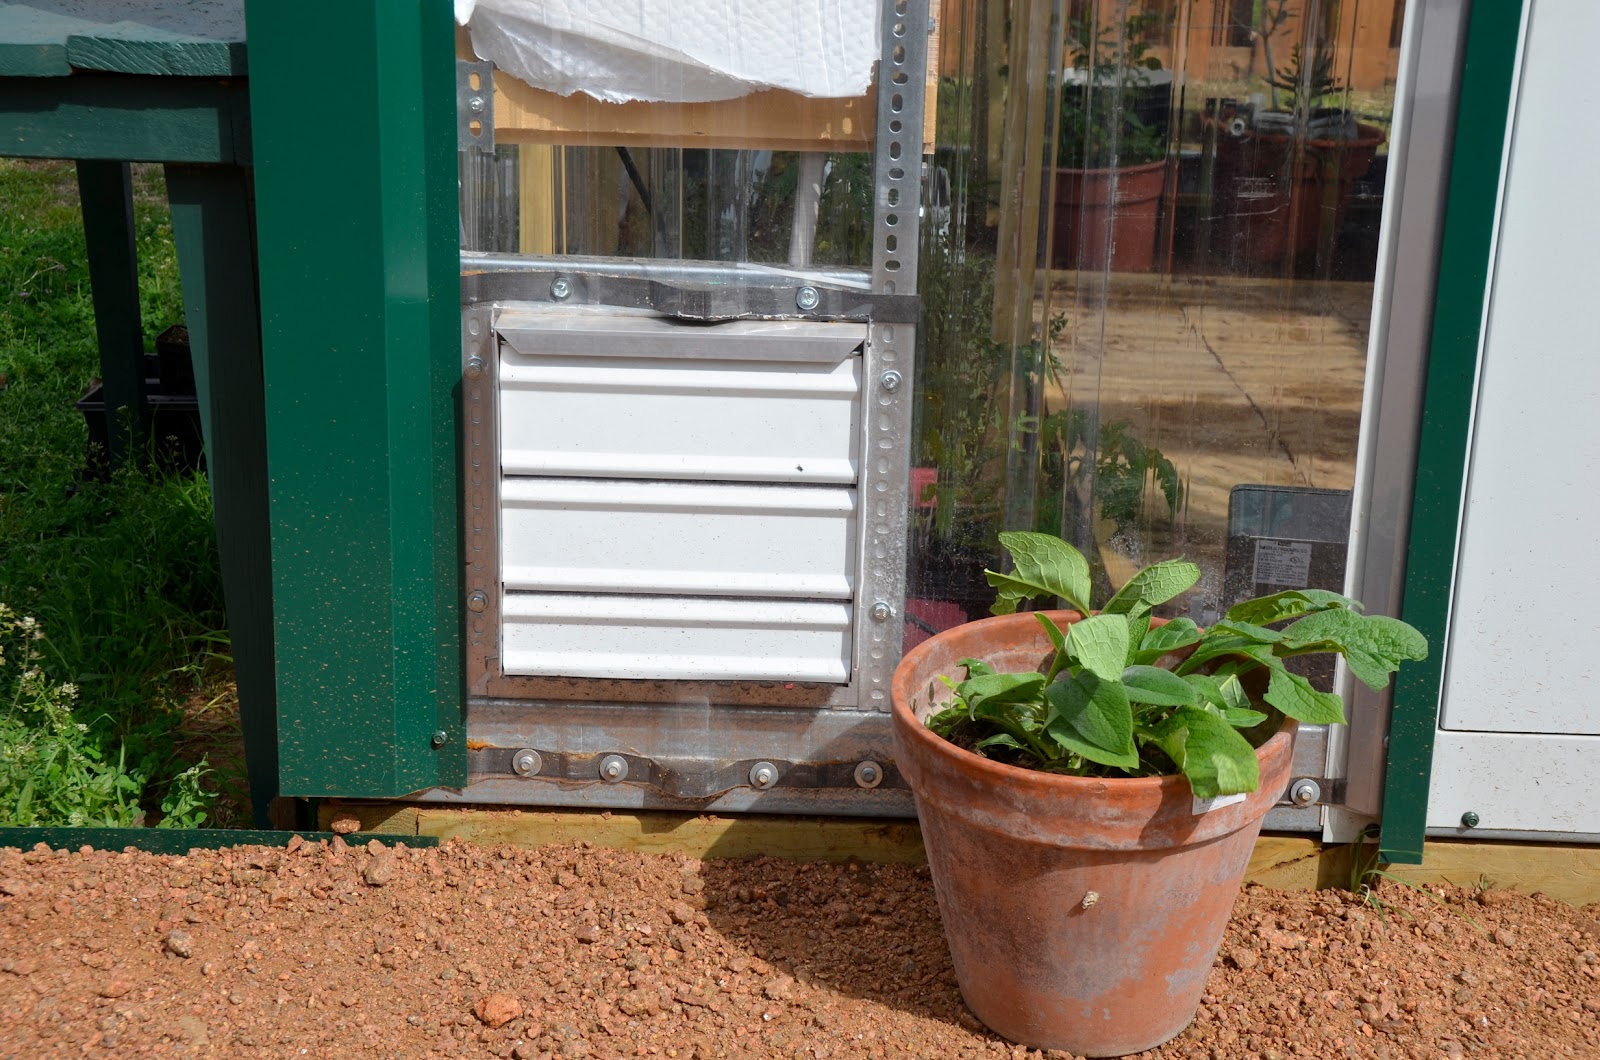
This picture below will give you a general idea of the ventilation and heating system. The first picture shows the 12" exhaust fan. The second photo shows the fan speed control, heater thermostat, and ventilation thermostat. The bottom photo shows the exterior of the 12" intake fan which is electronically controlled. Crazy Texas weather means that booth systems are frequently used through the winter!


It may seem like this type of system is overkill for a hobby greenhouse but anyone who has a greenhouse in Texas will tell you that if you ever want to leave town for a day, you will need a fully automatic system to protect your plants. For example, before I had the ventilation system installed in late January, I forgot to come home at lunch and open the windows to allow air flow (I couldn't open them first thing in the morning because it was still freezing!), and when I remembered and ran home to open the greenhouse up, it was 107 degrees and my tomato starts were burning up. This is a common Texas problem, believe me!
A word on the Mueller greenhouse: It is a barn with clear sides. This means two things for the prospective Mueller greenhouse owner.
First, be prepared to take extra care in sealing every seam with caulk. Be sure that all the rubber strips are properly aligned. The biggest surprise for me as the "opening" between the walls and the gables. It is a one inch gap that runs the length of both gabled ends. It's probably an excellent idea for barns but a terrible idea for a "sealed" greenhouse. However, it wasn't a difficult fix. I just tucked strips of the 1 inch foam pipe insulation into the gap and it was fixed!
The second item to be prepared for is the customization to incorporate the ventilation system into the structure. It is not difficult but it requires additional tools and some mechanical knowhow. The plastic sheets must be cut (carefully!) to create the openings for the vent and fan. I used a dremel tool (be sure to have a lot of cutting disks on hand!). Additional framing is needed to hold the vent and fan in place. I used steel L braces screwed into the greenhouse frame...very sturdy! You can see the framing above.
Since I'm not an electrical genius, I bought a complete ventilation kit from ACF greenhouses. They were the cheapest I found, had a calculator to determine what size equipment I needed, and had great instructions. The kit had everything I needed including wire, conduit, etc.
The good news about my Mueller's greenhouse... It is as strong as advertised. Everyone who has commented on the structure has been impressed with the construction quality. Several have opined that they felt the clear plastic sheets should hold up well (which is the number failure point for most greenhouse kits). It includes aluminum windows on the long ends and a sturdy white steel door with opening window (you won't find this kind of door on any other greenhouse either!). It's attractive (especially with plants inside) and should last a long time.

A beginner's take on construction... This was the biggest home construction project I've ever done and it was fairly easy to put up. It comes with written instructions and a DVD but the instructions could have been a little more detailed for a beginner for me. It is definitely a two-man job. I put more effort in the foundation than they recommended. I used 4x4 treated lumber anchored in concrete. I bolted the frame to the timbers and caulked around the edges. It's not going anywhere! Mueller's casually suggests bracing the corner wall beams which means....brace them! Have some material on hand to square and brace the corners. The rest goes up pretty easy. Be careful to not stretch the plastic as you mount it and CAULK EVERYTHING! My biggest regret is that I didn't caulk more.
Finishing touches... I built my own shelving using 1x6 cedar pickets. I mounted the shelves on those big beams running down the center of the walls. This meant that the shelves didn't have to be free-standing and where very sturdy. I built shelves along both long walls. You will notice in the picture below that I also built a portable second shelf on hinges above the primary shelf. I use it for overflow during the spring garden season and it blocks some of the west sun during the summer. I also bricked the main path with 1x1 ft. paving stones and mulched the rest with cedar mulch. All of this is on top of a double layer of landscape fabric to prevent weeds from growing inside the greenhouse.

Last thoughts.... This greenhouse is a nice size with plenty of headroom for me and hanging baskets. The roof C beams are excellent for holding hanging baskets. I plan on keeping a shade cloth on the greenhouse once it gets closer to summer for temperature control. You can see both in the photo below.

That's it! Stay tuned as I'll update you on my new greenhouse in the coming gardening season.
Thank you for sharing valuable information. Nice post. I enjoyed reading this post. The whole blog is very nice found some good stuff and good information here Thanks..Also visit my page patio misters Ecologic Technologies Misting System Kits are loaded with great features!
ReplyDeleteThis is an awesome portable greenhouse from http://www.bizarkdeal.com/. Real sturdy and very easy to put together. No doubt it & my plants will hold up in our Texas winters. I just cannot keep quiet and do not recommend this product!
ReplyDeleteThis is a great inspiring article.I am pretty much with your good work.You put really very helpful information. Keep it up. Keep blogging. Looking to reading your next post.
ReplyDeletepest control san antonio
Nice and quite informative post. I really look forward to your other posts.
ReplyDeleteMy experience is that these are not do it yourself products. The bolt holes are grossly misaligned. Mueller's response was "deal with it"
ReplyDeleteBe prepared to struggle with enlarging holes, filing, driving a large punch through the holes, etc. It will add a lot of time and frustration. You'll have to remedy the issue yourself because Mueller will not stand behind the product, at least not with me.
I sent them photos that clearly show the very poor alignment.
thanks for sharing. My husband and I are currently building my 9x12 Mueller greenhouse. I'm glad to see someone posting their experience with it. I'm surprise that there are not other bloggers or youtubers posting about the Mueller greenhouse. Out of curiosity what caused you to have to caulk so much? Did it leak water? So far, I find that the instruction manual & online videos from Mueller are not detailed enough especially for the price we paid for the kit. I thought they would be much more thorough.
ReplyDelete